Sauces & Condiments
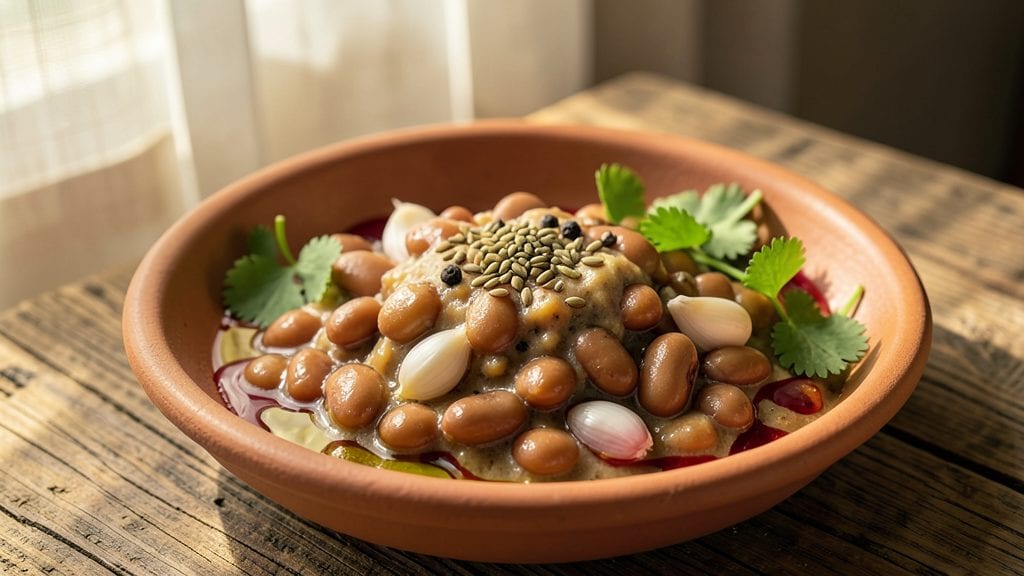
This bean chutney recipe transforms simple ingredients into a bold, tangy condiment that elevates everything from grilled meats to crispy dosas. The secret lies in balancing kidney beans, aromatic spices, and a touch of acidity—creating a sauce that’s both vibrant and deeply flavorful.
I’ve perfected this version over years of testing, ensuring it’s smooth yet textured, with just the right kick of heat and brightness.
What makes this chutney special is its versatility—it works as a dip, a spread, or a marinade base, and keeps well in the fridge for up to a week.
The process is straightforward: beans are pressure-cooked until tender, then blended with toasted spices, vinegar, and a hint of garlic for depth. Simmering the mixture reduces it to a thick, spreadable consistency that clings beautifully to food.
By the time you’re done, you’ll have a spiced and tangy chutney that’s rich enough to stand alone but balanced enough to complement any meal. The aroma alone—warm cumin, tangy vinegar, and earthy beans—will have your kitchen smelling like a bustling South Indian restaurant.
Pair it with grilled chicken, use it as a dip for fries, or spread it on sandwiches for an instant flavor boost.
This recipe delivers restaurant-quality results with minimal effort, making it perfect for weeknight dinners or meal prep. The key is patience—letting the flavors meld during simmering ensures every bite is packed with complexity. Ready to transform your meals with this game-changing condiment?
Ingredients for bean chutney
Nine simple ingredients transform into a vibrant, restaurant-quality bean chutney that’s bold and tangy.
| Ingredient | Amount | Notes |
|---|---|---|
| Kidney Beans (Dried) 🌱 | 1 ½ cups | Soaked overnight, drained |
| Extra-Virgin Olive Oil 🫒 | ½ cup | High-quality, fruity variety |
| Red Wine Vinegar 🍷 | ¼ cup | Balsamic works too |
| Fresh Cilantro Leaves 🌿 | ½ cup | Stems removed, packed |
| Garlic Cloves 🧄 | 6 cloves | Peeled, roughly chopped |
| Ground Cumin Seeds 🌿 | 2 tsp | Toasted for depth |
| Ground Coriander Seeds 🌿 | 1 ½ tsp | Toasted for aroma |
| Red Chili Powder 🌶️ | 1 ½ tsp | Adjust for heat |
| Salt 🧂 | 1 tsp | Diamond Crystal preferred |
| Lemon Juice 🍋 | 2 tbsp | Freshly squeezed |
The kidney beans are the heart of this chutney—dried beans develop deeper flavor than canned, but if you're short on time, no-soak beans work fine. Toast the cumin and coriander seeds in a dry pan until fragrant (about 2 minutes) before grinding—this boosts aroma dramatically. For the best vinegar, Trader Joe's or Whole Foods carry high-quality red wine vinegar that won’t overpower the dish. The cilantro should be bright green; if it’s wilting, give it a quick soak in ice water to revive it before chopping.
No red wine vinegar? Apple cider vinegar or white vinegar work in a pinch, though they’ll shift the flavor slightly. Running low on fresh cilantro? Dried cilantro at half the amount adds a different but still pleasant note. The garlic can be roasted for a sweeter profile—wrap the whole cloves in foil, roast at 400°F for 10 minutes, then peel. For extra richness, add 1 tbsp tahini to the final blend. The chili powder is where you can play—start with 1 tsp if you’re sensitive to heat, then adjust to taste.
This chutney thickens as it sits, so stir in a splash of water if it gets too stiff. Store in an airtight jar in the fridge for up to 1 week, or freeze for 3 months in ice cube trays for single-serving portions. The flavor actually improves after the first day as the spices meld. I like to make a double batch—one for immediate use and one to freeze for lazy weeknights.
Why You'll Love This Recipe
- No-Soaking Needed: I’ll admit, I used to dread dried beans—but these kidney beans soften beautifully overnight in water, so by morning, they’re ready to blend. No fancy soaking tricks, just a bowl and patience.
- Garlic-Cilantro Punch: That raw garlic and cilantro combo? It’s the star. The vinegar brightens everything, and the olive oil keeps it from being too sharp—like a fresh, zesty hug in every bite.
- Weeknight Sidekick: Spread it on toast, dollop over grilled chicken, or toss with roasted veggies. It’s my go-to when I’m too tired for a full meal but still want something ridiculously good.
- Budget Magic: Dried beans are a steal, and this chutney stretches far—enough for lunches, snacks, or even a quick dip. Honestly, I make it just to have a backup pantry staple.
Step-by-step instructions for spiced and tangy bean chutney
Here's how to transform simple ingredients into a vibrant, multi-layered chutney that balances heat, acidity, and earthy depth.
Toast the Spices for Maximum Flavor
In a dry skillet over medium heat, toast the 2 teaspoons ground cumin seeds and 1.5 teaspoons ground coriander seeds for 1-2 minutes until fragrant. You'll smell their warm, nutty aromas intensify—this is crucial for building the chutney's complex flavor profile. Immediately transfer the toasted spices to a bowl to cool while you prepare the remaining ingredients.
Real talk: Skipping this step means missing out on that deep, toasty base. The spices should smell like a spice market when properly toasted, not just raw seeds. If you notice any burning (darkening), remove them immediately—they'll turn bitter. Let them cool completely before using.
Cook the Garlic and Beans Until Tender
Heat the 0.5 cup extra-virgin olive oil in a medium saucepan over medium heat. Add the 6 cloves peeled garlic and cook for 1 minute until just golden—don't let them brown or they'll become bitter. Remove the garlic with a slotted spoon and set aside.
To the same pan, add the drained 1.5 cups soaked kidney beans (they should be plump from soaking). Stir in the 1.5 teaspoons red chili powder and 1 teaspoon salt, then add 0.25 cup red wine vinegar. Cook for 8-10 minutes until the beans are tender but still hold their shape—you want them to break down slightly but maintain texture. The mixture should smell like a perfect balance of tangy, spicy, and earthy.
Blend Until Silky Smooth
Transfer the bean mixture to a food processor or high-powered blender. Add the toasted spices, cooked garlic, and 0.5 cup fresh cilantro leaves. Pulse until everything is finely chopped, then blend continuously for 1-2 minutes until completely smooth. Scrape down the sides as needed to ensure even blending. The chutney should look velvety with no visible texture—this ensures a luxurious mouthfeel.
Here's the thing—if your blender struggles, add 1-2 tablespoons water to help it along. The consistency should be thick but pourable, like a rich dip. If it's too thick after blending, thin it with 1 tablespoon water at a time until it reaches your desired texture. Taste as you go and adjust the 2 tablespoons lemon juice for brightness—you want that bright acidity to cut through the richness.
Adjust Seasoning and Rest for Depth
Transfer the blended chutney to a bowl and let it sit at room temperature for 10 minutes. This resting period allows the flavors to meld and the spices to bloom fully. Taste and adjust the seasoning—add more salt if needed, or a splash of red wine vinegar for extra tang. The chutney should balance heat, acidity, and earthiness in every bite.
For the best results, refrigerate the chutney for at least 1 hour before serving. This chilling step intensifies the flavors and makes the texture even more refined. When ready to serve, give it a good stir—it may thicken slightly in the fridge, so adjust with water if needed. This chutney keeps well in the refrigerator for up to 5 days, making it perfect for meal prep.
Pro Tips For Making Bean Chutney
- Soak Beans Overnight: I used to skip this and wonder why my chutney tasted flat—kidney beans need at least 8 hours in warm water to soften properly. Drain and rinse before cooking, or they’ll stay stubbornly tough even after simmering.
- Sauté Garlic Low: Crank the heat to medium-low for your garlic, or it’ll burn before the beans even get a chance to flavor the oil. Golden brown is the goal—charred garlic turns bitter and overpowers the whole dish.
- Pulse Cilantro Lightly: A quick 3-4 pulses in the food processor is all you need—over-chopping turns cilantro into a sad, mushy paste. Keep some whole leaves for texture, or your chutney will lose that bright, fresh finish.
- Finish with Vinegar: Taste before adding the red wine vinegar—acid balance matters. A splash at the end brightens the flavors without making the beans taste raw. Start with 1 tablespoon, then adjust.
Make-ahead tips for this bean chutney
Batch Prep Strategy
Make a double batch of this bean chutney—it’s ideal for meal prep! The extra serves as a quick condiment for future meals or as a base for other recipes like spiced bean dips or marinades.
I store my extra portions in 4-ounce glass jars with tight-sealing lids, which keeps them fresh and portion-controlled for up to 3 months in the freezer. 🥫
Freezing for Convenience
Freeze chutney in ice cube trays for single-serving portions—perfect for adding to sandwiches, bowls, or grilled meats later. Once frozen, transfer the cubes to a ziplock bag and label with the date.
Thaw overnight in the fridge before using. The texture remains smooth, though it may thicken slightly—just stir in 1 tsp water to restore consistency. ❄️
Spice Toasting Shortcut
Save time by pre-toasting your spices in bulk and storing them in an airtight container for up to 2 weeks. I keep a small jar of toasted cumin and coriander seeds on hand—just scoop what you need for this chutney or other recipes like curries or roasted vegetables.
This step is worth the effort, but prepping ahead makes it effortless. 🌶️
Flavor Development Timeline
Let the chutney rest for at least 24 hours before using—this is when the flavors truly meld. The spices deepen, the acidity brightens, and the beans soften further, creating a richer, more complex taste.
I often make my chutney the night before a big meal so it’s ready to elevate dishes like grilled lamb or crispy dosas the next day. 💡
Storage Containers Matter
Use glass containers over plastic—they preserve flavor better and won’t absorb odors. I recommend Le Parfait jars for their airtight seals and stackable design. Store chutney in the fridge for up to 1 week or freeze for 3 months.
The glass also makes it easy to check the consistency—just give it a quick stir before each use. 🍽️
Reviving Stale Chutney
If your chutney loses brightness after a few days, revive it by adding 1 tsp fresh lemon juice and a pinch of salt. Stir well and let it sit for 10 minutes—this restores the tangy kick.
For extra richness, add 1 tsp olive oil to restore body. This trick works like magic for chutney that’s been sitting too long. ✨
Nutrition facts
Frequently asked questions
Can I use canned beans instead of dried for this chutney?
Yes! Canned beans work perfectly—just drain and rinse them well to remove excess sodium. For 1.5 cups dried beans, use 2 (15-ounce) cans of kidney beans. They’ll be ready to cook immediately, saving you 8+ hours of soaking time. The texture will be slightly softer, but the flavor remains rich and vibrant.
How do I adjust the heat level in this chutney?
Start with 1 teaspoon red chili powder for mild heat, then increase to 1.5 teaspoons for medium, or add ½ teaspoon cayenne pepper for extra kick. For a smoky depth, toast ¼ teaspoon smoked paprika with your spices. Always taste as you go—you can’t overdo the heat, but you can’t fix blandness later.
What’s the best way to store leftover chutney?
Transfer to an airtight glass jar and refrigerate for up to 1 week. For longer storage, freeze in ice cube trays, then transfer to a bag. Thaw overnight in the fridge—it may thicken slightly, so stir in 1 teaspoon water to restore consistency. Glass containers preserve flavor better than plastic.
Can I make this chutney without a food processor?
Use a mortar and pestle for a rustic texture, or finely chop all ingredients by hand. For a smoother result, blend in batches with an immersion blender. The chutney will have a slightly grainier texture but still pack bold flavors. Just pulse longer to break down the beans completely.
What are the best pairing ideas for this chutney?
This chutney shines with grilled meats (chicken, lamb, or fish), crispy dosas, or as a dip for pita chips. Spread it on sandwiches with avocado, or drizzle it over roasted vegetables. The tangy-spiced profile also complements cheese boards or charcuterie for a global twist.